Wednesday, June 3, 2015

52 Mini Albums Journals & Such; Project 28: Peek Wrap

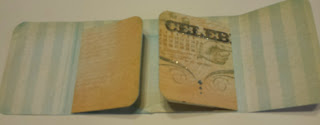
Until I can figure out my video camera to Windows 8 to YouTube mystery, I'm going to do some of the one page tuts on my blog. This is one that has been done in several different styles but I like this one where the inside flips peek out the front opening. This will be a go to for different picture sizes as there is room for both larger and smaller photos. As you know, my favorite pic size is the wallet size because my printer will print NINE on one page for me. Quick and easy and saves paper!


First we are going to take a 12" x 12" double sided designer paper. I am using a piece of Lost & Found by My Mind's Eye called Portobello Road "Party" Celebrate.

I have positioned it to get the best display of graphics so check your design before cutting!

The top piece measures 12" long and 4" high. It will be scored at 2.5", 2.75", 9.25" and 9.5"

Your second strip measures 12" x 3.5". It is scored at 3" and 9".

The third strip measures 12" x 2". Cut it down into (2) 3.5" x 2" and (1) 5" x 2" pieces. Cut this 5" x 2" piece from corner to corner to create two triangles. Score a .5" flap on the 2 straight edges on both triangles.

Your remaining 12" x 2.5" piece is cut into (2) 4.5" x 2.5" and (1) 3" x 2.5".  On the (2) 4.5" x 2.5", score a .5" flap on the two short edges and one long edge on each.


Punch thumb holes as shown on the two 4.5" x 2.5" pocket pieces and the center top of the 12" x 3.5" piece which was your SECOND strip.

I rounded my corners on my wrap pieces, my 4.5" x 2.5" pocket lower corners and my 3" x 2.5" tag as shown. Angle cut the bottom corner of your two triangle pocket pieces and the top corners of your 3.5" x 2" tags. Punch a hole in the top of your tags.

Assembly:

Attach your two pockets to each end of your 12" x 3,5" strip (SECOND STRIP),
Attach your triangles by glueing the bottom triangle flap UNDER your strip and your side flaps under being careful not to go past the 3" and 9" score lines.

Position your pocketed strip on top of your 12" x 4" strip, matching the bottom edge. Glue down the bottom and the sides (if desired) staying inside the 3" and 9" score line to create a pocket. I leave the sides open and still use it as a pocket.


Insert tags where ever you like and add your own photos filling the pockets and on the flaps. Decorate away!


Tie a ribbon around it to close it if needed. This will be a fun one to make for friends with clever papers...looks complicated but takes less than 10 minutes! Let me see your creations please and thank you! Tell your friends that I will have tuts here for a while. Thank you, be blessed and HUGS! KitB

Sunday, May 31, 2015

Another Altered Book

Worked late unto the night to get this finished. Started on it a month ago!

Sunday, March 29, 2015

Big Flippin Album

This one is ready to go on a road trip I am planning to take this year to go to my high school reunion...I can't wait!

nion. 

Ladies Diary Album

Another album I've finished using Graphic 45 papers, envelopes and note cards. Another tutorial in my Etsy Shop if you find it interesting.

My Big Flippin Folder Album

Here is an album I have finished using Graphic 45 papers.  I love these big albums and the tutorial is available in my Etsy shop.  Hope this makes you smile!

Thursday, March 26, 2015

Baby Sweet Baby

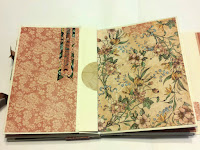
I just finished this project and it is the first time I have made anything like this. This is for a friend who just became a great grandmother so I wanted to do something fun and vintage looking. I wanted an album that would be easy for her to use and would already look time-worn and loved. Click on the pics to see full photo as I still am struggling with adding to my blog from my phone. The covers are made from cardboard and all pages measure 12' x 12'. In between each interior page, I have added a gold embossed vellum page to give even more display space. I am happy with all the vintage elements I found to use and it has tons of quirky journaling cards to add "The Story." Now back to mini albums!

Monday, March 9, 2015

Paper Kitz Twirling In My Tutu

Paper Kitz Twirling In My Tutu
I have figured out how to do a post and add pics from my phone. Then I save as a draft and actually post from my iPad. Is there an easier way you professional bloggers out there? I have an Adroid with Blogger...that's as far as I have gotten because I can't find a blogging app for my iPad that will let attach pics. HELP! Please and thank you!

Sunday, March 8, 2015

Time Change Jitters

It's 10:30 in the evening and feels like 9:30 due to the time change. I prefer the fall when we gain an hour, don't you? It makes me feel younger! I found myself chewing on the inside of my cheek as I felt like doing something but I didn't really have time before bedtime to start a project. I contemplated eating a peanut butter cup. I considered drinking some tea. I went to check on hubby and he was snoring away in his man cave so I knew he was alive. Then the lightbulb came on and I decided to watercolor...quick, easy...not MESSY. Whoop, whoop! I made a couple of journal pages and if I can figure out how to load a picture from my phone on here...I will show you. Happy Sunday Eve and welcome to the new time zone!

Saturday, March 7, 2015

I Found My Password!

I am back! I have being trying to remember how to get back on my blog for ages. I ended up just going on my Facebook page to post as it was easier but ran across a notebook of designs this morning and inside the cover were my instructions for my blog! Now that I am back in it I see a lot has changed so now have to be retrained. Sigh...such is life. If you are still with me....

Tuesday, December 18, 2012

Can Someone Help Me Move This Tree a Little to the Left?

!

Cupcake to the rescue!!!


Prince William in His British Gear!

Thank you, Auntie Anne! I find my outfit very relaxing!

Hugs and Num Nums from Will!

Merry Christmas to You All!

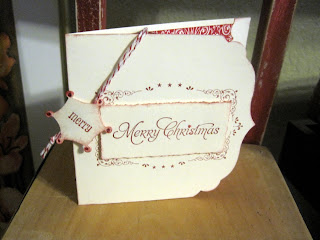
I can't believe how fast time is flying!!! Since I can't get a Christmas Card sent out to all of you, I am going to show you what your card would have looked like if I had gotten them finished sooner and had all your addresses....... (wink)


OK...here's what I want you to do. Make a copy of this card, sign my name to it and give yourself a big ol HUG! There....mission accomplished! LOLOLOL We do have fun, don't we?!

Wishing you a Blessed Christmas and a Wonderful New Year, where ever you be! Thank you for being you!
Hugs, Kit